The Best Homemade Eskimo Pie Popsicle Recipe
Introduction:
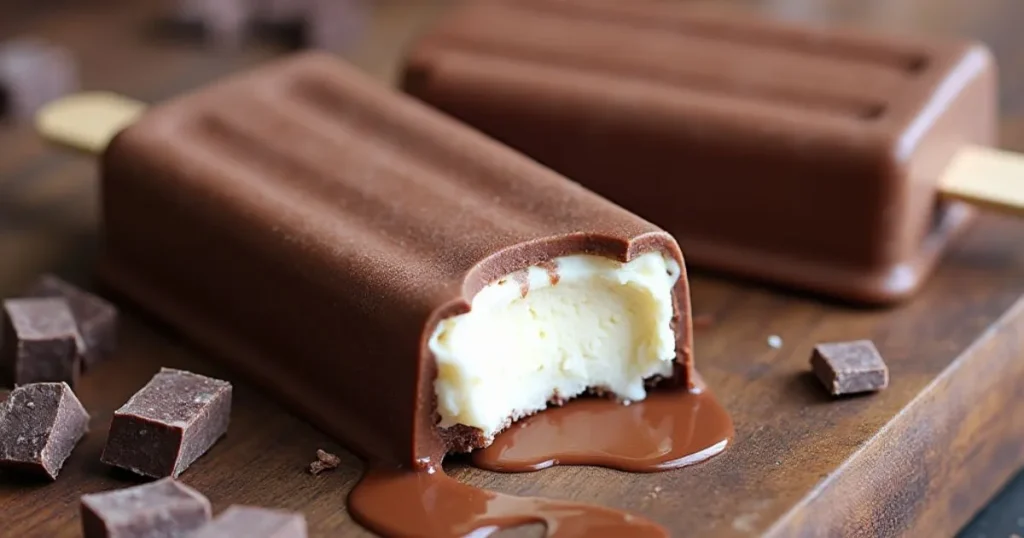
Who doesn’t love a sweet, creamy treat wrapped in a rich, crunchy chocolate coating? The Eskimo Pie is a classic dessert that has been delighting taste buds for decades, but what if we told you that you could make a better version at home? That’s right—this is The Best Homemade Eskimo Pie Popsicle Recipe you’ll ever need. Whether you’re craving something nostalgic or just want a fun kitchen project, we’ve got all the tips, tricks, and mouthwatering variations to take your popsicle game to the next level.
From creamy ice cream bases to silky chocolate coatings, keep reading to find out how you can whip up these irresistible popsicles in your own kitchen! Rest assured, your freezer will be grateful.

Table of Contents
Ingredients for Homemade Eskimo Pie Popsicle
Ready to make your own delicious Eskimo Pie popsicles? Let’s start with the ingredients. Don’t worry, this recipe is super flexible – you can mix and match based on your preferences or dietary needs. Whether you’re making them for a treat, a party, or just because, we’ve got all the basics (and a few fun extras) covered!
Essential Ingredients
First, the must-haves for your Eskimo Pie popsicles:
- Ice cream base (vanilla or chocolate): You can’t have an Eskimo Pie without a creamy ice cream filling! Whether you’re keeping it classic with vanilla or going bold with chocolate, make sure to choose a smooth, rich base. You can use store-bought, homemade, or even a dairy-free option if you’re feeling adventurous!
- Chocolate coating (high-quality or homemade): This is where the magic happens. A luscious, crispy chocolate layer that cracks perfectly when you take a bite is the star of the show. You can either go for store-bought, high-quality chocolate or make your own by melting some dark, milk, or white chocolate – the choice is yours!
- Popsicle sticks: The glue that holds your popsicle together – literally! Wooden sticks are ideal, but if you’re in a pinch, you can use sturdy plastic ones too.
Optional Ingredients for Variations
Now, let’s get a little creative! These optional ingredients let you customize your Eskimo Pie popsicles to match your taste buds. Don’t be shy—add some flair!
- Toppings like crushed nuts or sprinkles: Want a little crunch? Chopped almonds, pistachios, or peanuts make for a delightful texture contrast. Or, go all out with colorful sprinkles for that fun, party-ready vibe.
- Flavor infusions (coconut, caramel, etc.): Take your popsicles to a whole new level by infusing the ice cream with extra flavors! A bit of coconut extract or a swirl of caramel can make your popsicles even more exciting.
- Health-conscious alternatives: Looking for a lighter option? Swap out regular ice cream for a dairy-free or sugar-free version. You can even use almond milk or coconut milk for the base – no one will know the difference when it tastes this good!
These little touches are what will make your homemade Eskimo Pie popsicles uniquely yours. Ready to get mixing? Let’s move on to the fun part—making them!
Step-by-Step Instructions for Homemade Eskimo Pie Popsicles

Time to get your hands dirty (in a delicious way)! Follow these easy steps to make the ultimate homemade Eskimo Pie popsicles. Don’t worry, we’ve broken it down so it’s smooth sailing from start to finish!
Preparing the Ice Cream Base
The first step is choosing your ice cream base. Whether you’re going the store-bought route or feeling adventurous with a homemade batch, we’ve got the lowdown:
- Store-bought ice cream: Just pick your favorite flavor (vanilla or chocolate are the classics) and let it soften a bit at room temperature. This makes it easier to scoop and mold without making a mess.
- Homemade ice cream: If you’re a DIY enthusiast, whip up a batch of your favorite homemade ice cream. Just make sure the texture is nice and smooth—this will help it freeze evenly inside the molds. If you’re looking for a healthier option, you can also make a dairy-free or sugar-free version!
The goal here is to make sure the ice cream is soft enough to work with but not too melty. If it’s too hard, it won’t fill the molds easily; too soft, and it will run everywhere. Find that sweet spot!
Assembling the Popsicles
Now comes the fun part: building your popsicles! Here’s how to do it:
- Grab your popsicle molds (metal or silicone works great).
- Scoop the softened ice cream into the molds, filling them about 3/4 of the way full. Be sure to press down gently to eliminate air pockets and make the ice cream as smooth as possible.
- Once you’ve filled your molds, carefully insert your popsicle sticks. Aim for the middle so they stay centered, and give them a little wiggle to make sure they’re steady.
Pop the molds in the freezer and let them freeze for at least 4-6 hours, or overnight for best results. You want the ice cream to be firm before you dip them into the chocolate—this prevents a messy melt!
Dipping in Chocolate
Here’s where the magic happens! Dipping your frozen popsicle into a silky chocolate coating is what transforms them into the classic Eskimo Pie:
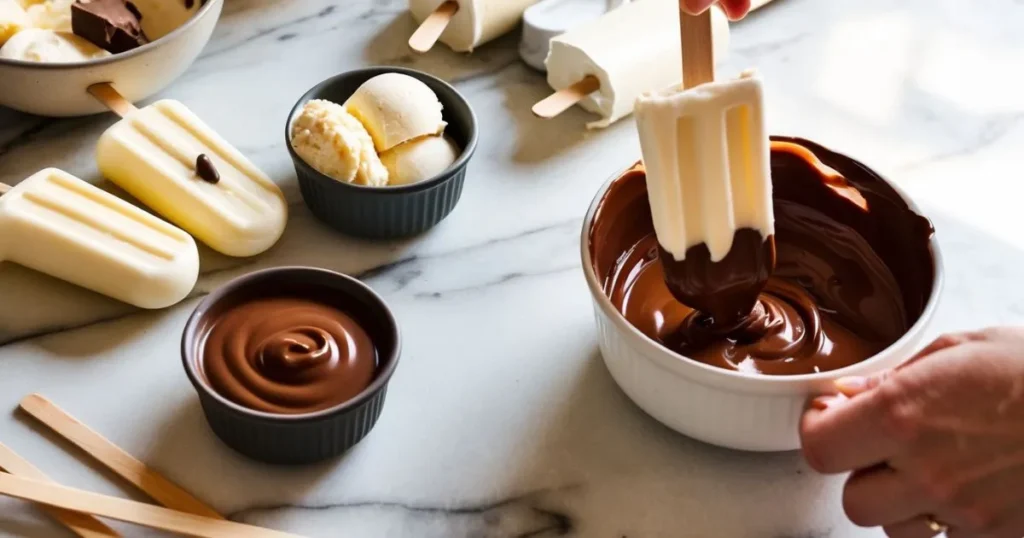
- Melting the chocolate: Start by melting your chocolate. You can either do this in a heatproof bowl over simmering water (double boiler style) or microwave it in short bursts, stirring in between. If you’re feeling fancy, you can mix in a tablespoon of coconut oil or vegetable oil to give it that extra smooth, glossy finish.
- Avoid overheating: Chocolate is picky. If it gets too hot, it can seize up and get all clumpy. So, be patient, and don’t rush the melting process. Stir frequently and keep an eye on it!
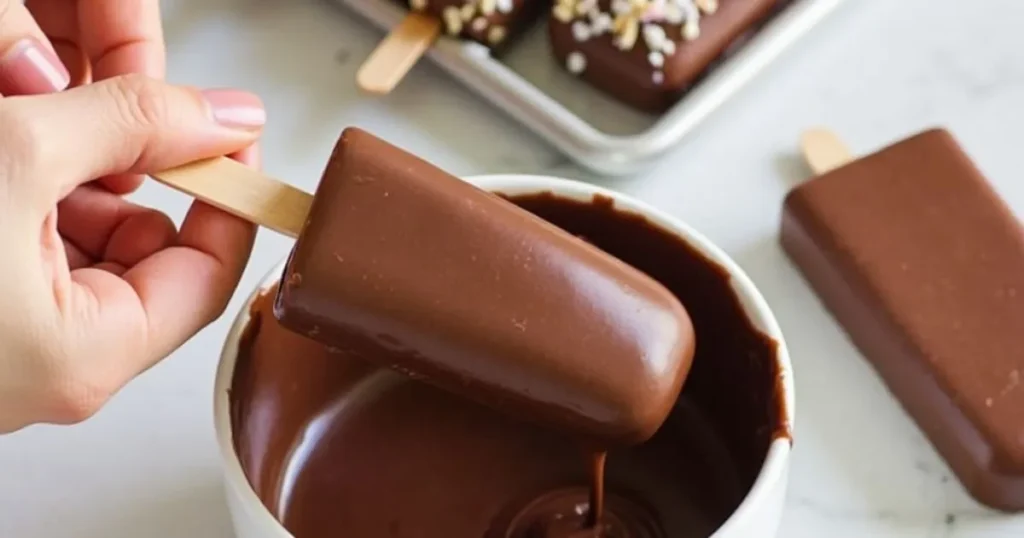
- Dipping the popsicles: Once your chocolate is ready, take a popsicle from the freezer and dip it into the chocolate. Hold the stick and dip it all the way down, ensuring the ice cream is fully covered in chocolate. If you want a thicker layer, just dip it twice—let it harden between dips.
- Freezing between dips: If you’re going for that perfect, crispy chocolate shell, you may need to freeze the popsicles for about 10 minutes before dipping a second time. This helps the chocolate set before adding more.
Final Touches
Almost there! The last step is where you get to add some personal flair:
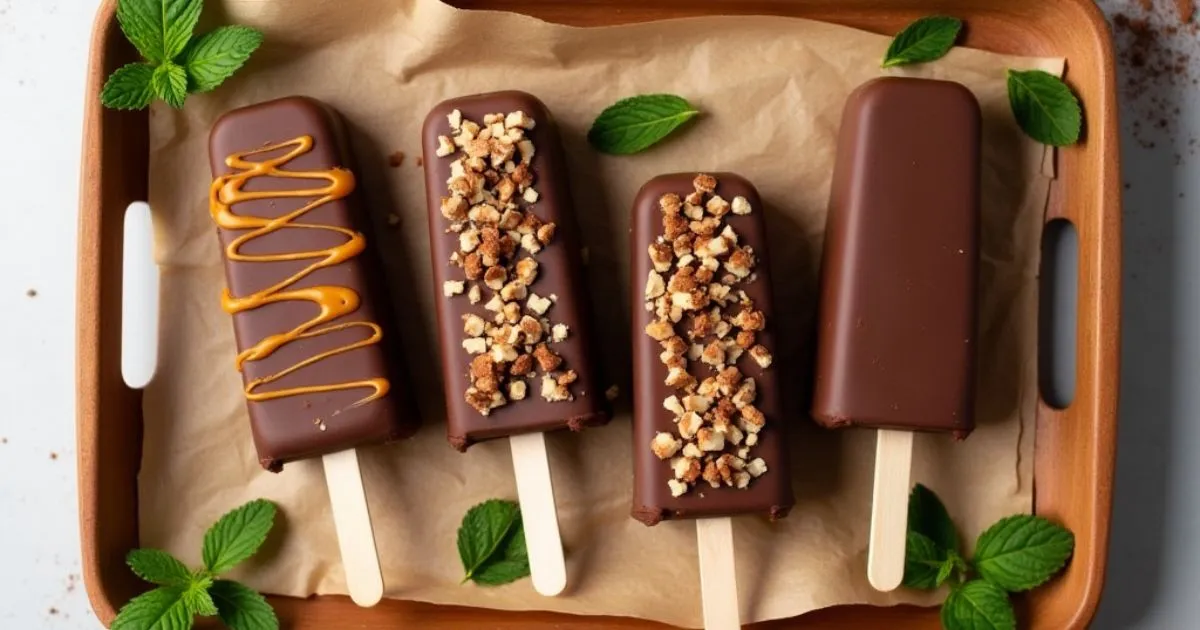
- Letting the chocolate harden: After dipping, place your popsicles on a parchment-lined tray and let the chocolate fully set. This will only take about 10-15 minutes in the freezer, but you can always wait a bit longer if you want that perfectly solid, crackable layer.
- Adding optional toppings: If you’re feeling extra, now’s the time to sprinkle on some toppings! Crushed nuts, colorful sprinkles, or even a drizzle of caramel or melted peanut butter are all perfect ways to elevate your Eskimo Pie popsicles. Get creative!
Once the chocolate is fully hardened, your Eskimo Pie popsicles are ready to go! Pop them into a container, store in the freezer, and enjoy the fruits of your labor. You’ve just made the perfect homemade treat!
Troubleshooting Common Issues
Every kitchen adventure has its little hiccups, but don’t worry—we’ve got the solutions to keep your Eskimo Pie popsicles looking and tasting perfect! Check out these common issues and how to fix them like a pro.
Soft Ice Cream Before Dipping
One of the trickiest parts of making Eskimo Pie popsicles is getting that perfect ice cream texture. If your ice cream is too soft before dipping, you might end up with a gooey mess. Here’s how to keep things neat:
- Let the ice cream firm up: If your ice cream feels a little too soft or melty, place the popsicle molds in the freezer for a little longer before you dip them. Aim for the ice cream to be firm, but not as solid as a rock. A good 4-6 hours of freeze time should do the trick!
- Don’t rush the process: Give your ice cream time to set in the molds before you dip it in chocolate. It might be tempting to dive in quickly, but trust us—patience makes all the difference in the world when it comes to avoiding drips or sloppy dips.
- Slightly soften your ice cream: If you’re using store-bought ice cream, let it sit out at room temperature for just a few minutes to soften it slightly. This makes it easier to scoop and mold without too much mess.
Overheating the Chocolate
We’ve all been there—you’re melting chocolate, and suddenly, it goes from glossy to gritty. Yikes! Here’s how to avoid scorching the chocolate and still get that perfect, smooth coating:
- Low and slow: When melting chocolate, always use low heat! Whether you’re doing it on the stove with a double boiler or in the microwave, it’s crucial to heat it slowly to prevent overheating. Stir often to help the chocolate melt evenly.
- Use a double boiler: If you’re on the stovetop, opt for a double boiler method. This indirect heat helps maintain a steady temperature, which prevents burning or seizing. Place a heatproof bowl over simmering water, and stir gently as the chocolate melts.
- Microwave method: If you’re microwaving, start with 30-second intervals. Stir after each burst to ensure the chocolate is evenly melting. This will also help avoid any hot spots that can cause the chocolate to seize.
- Add a little oil: If your chocolate feels too thick or is on the verge of overheating, stir in a little bit of coconut oil or vegetable oil (about 1-2 tablespoons for every 8 oz. of chocolate). It’ll make the chocolate smoother and easier to coat your popsicles.
Difficulties in Dipping
Dipping your popsicles into chocolate should be fun, not frustrating. If you’re having trouble getting a smooth, even coating, here are a few fixes:
- Chill the popsicles well: If your ice cream is still too soft or the chocolate is too warm, it can lead to a messy dip. Make sure your popsicles are completely frozen, and your chocolate is just at the right consistency—thick enough to coat, but not too runny.
- Dip quickly and smoothly: When you dip, try to do it quickly, without hesitation. If you take too long, the chocolate might start to set before you’re done, leading to an uneven coat. Hold the stick and gently lower the popsicle into the chocolate, making sure it’s fully covered.
- Twist and tap: After dipping, give the popsicle stick a little twist and tap the popsicle gently on the side of the bowl to let any excess chocolate drip off. This helps ensure an even coating without any messy drips or puddles.
- Chill between dips: For extra-thick chocolate, consider dipping your popsicle twice. After the first dip, freeze it for a few minutes to let the chocolate set, then dip it a second time for a thicker, more satisfying layer.
With these troubleshooting tips, your Eskimo Pie popsicles will be smooth, shiny, and perfectly dipped—no more chocolate mishaps! Enjoy the process and, of course, the sweet rewards at the end!
Healthier Alternatives & Customizations for Homemade Eskimo Pie Popsicles

Who says indulgence can’t be a little healthier? Whether you’re watching your waistline, following dietary preferences, or just trying to sneak in a few extra nutrients, you can easily customize your Eskimo Pie popsicles to suit your needs. Let’s dive into some delicious alternatives and clever add-ins that make your popsicles both tasty and guilt-free!
Healthier Ice Cream Choices
You can still enjoy that creamy, dreamy ice cream base without all the added sugar and fat. Here are some options to make your ice cream healthier:
- Lightened-up store-bought ice cream: Look for lower-fat or reduced-sugar ice creams that still deliver on flavor. These are available in many grocery stores, and the best part is you don’t have to sacrifice taste! Some brands even make options with less added sugar, so you can indulge without the sugar crash.
- Dairy-free alternatives: If you’re dairy-free, no problem! Swap regular ice cream for coconut milk, almond milk, or cashew milk-based ice cream. These options are creamy, delicious, and packed with flavor. Plus, they’re often lower in calories than traditional dairy ice cream.
- Homemade frozen yogurt or sorbet: For an even lighter option, consider making your own frozen yogurt or sorbet. You can blend up frozen fruit with a bit of yogurt (dairy or dairy-free), sweeten it lightly with honey or maple syrup, and freeze it into your popsicle molds. This is a refreshing and fruity twist on the classic Eskimo Pie.
Healthier Chocolate Options
The chocolate coating is the signature element of Eskimo Pie popsicles, but that doesn’t mean you can’t make it a bit healthier. Here are some great alternatives for a better-for-you chocolate experience:
- Dark chocolate: Choose dark chocolate with a cocoa content of 70% or higher. Not only does dark chocolate pack a rich flavor, but it’s also filled with antioxidants and lower in sugar than milk chocolate. It’s the perfect choice for a decadent yet healthier chocolate coating.
- Sugar-free chocolate: If you’re cutting back on sugar, sugar-free chocolate is an excellent option. There are a variety of brands that offer delicious sugar-free or low-sugar chocolate options that still deliver that sweet, melty coating you love. Just make sure to check the ingredients to ensure you’re getting a quality product!
- Dairy-free chocolate: For those avoiding dairy, many brands offer dairy-free chocolate options, often made with coconut milk or other plant-based ingredients. These chocolates are just as rich and satisfying as their dairy counterparts, and they make a great alternative for vegan or lactose-free diets.
Extra Nutrition Additions
Want to sneak some extra nutrients into your popsicles? These healthy add-ins will give your Eskimo Pie popsicles a little extra oomph without compromising taste:
- Chia seeds: These tiny powerhouses are loaded with fiber, omega-3 fatty acids, and antioxidants. You can sprinkle chia seeds into the ice cream base or mix them into the chocolate for a nice crunch and an added nutritional boost.
- Oats: Oats are another great way to add fiber and heart-healthy benefits. Mix some rolled oats into your ice cream base for a chewy texture, or sprinkle them on top of the chocolate before it hardens to create a delightful crunchy topping.
- Nuts: Adding chopped almonds, walnuts, or pistachios not only gives your Eskimo Pie popsicles a nice crunch but also provides a healthy dose of protein, healthy fats, and fiber. They pair perfectly with both chocolate and ice cream, adding extra richness and flavor.
- Superfoods: If you want to take your popsicles to the next level, add in some superfoods like spirulina powder, matcha, or acai powder. A little goes a long way in terms of boosting nutrition—and don’t worry, the flavor is subtle enough that it won’t overpower the deliciousness!
With these healthier alternatives and nutritious additions, you can enjoy your homemade Eskimo Pie popsicles without any of the guilt. They’re just as fun, just as delicious, and a little bit better for you—what’s not to love?
Homemade Eskimo Pie Popsicles vs. Store-Bought: A Comparison
Ah, the eternal question: homemade or store-bought? When it comes to Eskimo Pie popsicles, the answer might surprise you. Let’s break it down—because while store-bought has its convenience, homemade popsicles are in a league of their own. Here’s why your kitchen creations might just be the ultimate winner!
Advantages of Homemade Popsicles
Making your Eskimo Pie popsicles from scratch comes with some pretty sweet perks:
- Endless Customization: Love dark chocolate? Prefer almond ice cream? Want to sprinkle crushed pistachios on top? When you make your own popsicles, you’re the boss. You can tailor every single element to your taste and dietary preferences, creating a treat that’s 100% you.
- Quality Control: With homemade popsicles, you know exactly what’s going in. There are no mystery additives, artificial flavors, or excessive sugars. You get to pick high-quality ingredients, ensuring your popsicles are fresh, wholesome, and free from unwanted extras.
- Cost-Effectiveness: While the initial investment in ingredients might seem higher, making popsicles at home is more affordable in the long run—especially if you’re making them in batches. Plus, you can reuse popsicle molds again and again, saving both money and waste!
Nutritional Differences
Let’s get real—store-bought treats often come with a side of unnecessary extras. Here’s how the homemade version stacks up:
- Fewer Additives: Store-bought Eskimo Pies can be loaded with preservatives, stabilizers, and artificial colors to extend shelf life and enhance appearance. With homemade popsicles, you skip all the unnecessary extras, keeping things simple and natural.
- Healthier Ingredients: You have the power to choose healthier options like reduced-sugar ice cream, dairy-free bases, or antioxidant-rich dark chocolate. Store-bought versions often prioritize flavor and shelf stability over nutrition, so making your own can be a much smarter choice.
- Calorie Control: By making your own, you can adjust the sweetness, chocolate thickness, and portion sizes to better fit your dietary needs. Store-bought versions often have a standardized size and calorie count, leaving little room for adjustment.
Taste and Texture Comparison
Here’s the real showdown: how do homemade Eskimo Pie popsicles compare to their store-bought cousins in flavor and feel?
- Taste Explosion: There’s something undeniably better about fresh, homemade desserts. With homemade popsicles, the ice cream tastes creamier, the chocolate richer, and the toppings fresher. Plus, you get to enjoy flavors tailored specifically to your preferences. No more wishing there was just a bit more chocolate—you can dip as thickly as you please!
- Texture Heaven: Store-bought Eskimo Pies are designed to withstand transport and sitting in a freezer for weeks (or longer), which can affect texture. Homemade popsicles, on the other hand, offer that just-made freshness with smoother ice cream and a crispier chocolate shell. Every bite feels like a gourmet treat.
- Creative Fulfillment: There’s nothing quite like the joy of crafting something with your own hands. Homemade popsicles give you the pride of crafting a dessert that’s as delicious as it is personal. It’s a flavor experience you simply can’t buy off a shelf.
The Verdict
While store-bought Eskimo Pies have their place for convenience, homemade wins in almost every other category. From better taste and texture to full customization and nutritional benefits, there’s no competition. So grab your popsicle molds and start crafting—you won’t regret it!
Frequently Asked Questions
How to make homemade popsicles creamy, not icy?
To make popsicles creamy rather than icy, use a base with a higher fat content, such as full-fat dairy, coconut milk, or Greek yogurt. Adding small amounts of sweeteners like honey or corn syrup can also prevent large ice crystals from forming. Ensure the mixture is blended thoroughly to create a smooth consistency.
Why did they change Eskimo Pie?
The name “Eskimo Pie” was changed to “Edy’s Pie” in 2020 to align with modern cultural sensitivities and avoid using terms that could be considered derogatory or outdated. The company sought to celebrate inclusivity while retaining the product’s delicious legacy.
Do they still make Eskimo bars?
Yes, the product formerly known as Eskimo Pie is still available under its new name, Edy’s Pie. It continues to be sold with the same iconic chocolate-coated ice cream treat, now rebranded for inclusivity.
How is Eskimo ice cream different?
Eskimo ice cream, or Akutaq, is a traditional dish from Indigenous Arctic cultures, made with ingredients like whipped animal fat, fish, and berries, rather than dairy. It is entirely distinct from the commercial chocolate-coated ice cream bars and reflects a unique cultural tradition.
Conclusion
And there you have it—the ultimate guide to making your own delicious homemade Eskimo Pie popsicles! From choosing the perfect ingredients and mastering the dipping technique to getting creative with flavor variations, you’ve got all the tools to craft these frozen treats like a pro. Whether you’re making them for a special occasion, a fun family activity, or just because you deserve a sweet treat, these popsicles are sure to impress.
So, grab your ingredients, get dipping, and enjoy every bite of your creamy, chocolate-coated masterpiece. And don’t forget to share your popsicle creations and ideas with us—after all, the best part about making something homemade is making it your own! 🍦✨
Key Takeaways
- Perfect Texture: Use a creamy ice cream base (like full-fat dairy or coconut milk) to avoid icy popsicles.
- Creative Variations: Customize your popsicles with fun flavors, toppings, and even alcohol infusions for a gourmet twist.
- Proper Dipping: Ensure the ice cream is solid before dipping in chocolate to achieve a smooth, glossy coat.
- Storage Tips: Wrap popsicles individually and store them in an airtight container to maintain freshness and prevent freezer burn.
- Healthier Alternatives: Experiment with dairy-free or lower-sugar options to make these popsicles fit your dietary preferences.

